Sunday, April 29, 2018

Cara Mendaftar dan Memasang Iklan Chitika

Cara Mendaftar dan Memasang Iklan Chitika di blogspot


           daftar dan pasang Iklan Chitika Di Blog


PENGERTIAN CHITIKA


Chitika adalah salah satu pilihan terbaik untuk alternatif google adsense dan membantu anda mendapatkan lebih banyak uang melalui blog anda. Dalam postingan kali ini saya akan memberikan ulasan tentang chitika dan cara memasang kode iklan chitika ke blog anda.


Baca : alternatif google adsense


Chitika melayani iklan kontekstual dan menampilkan iklan berdasarkan konten artikel anda, karena itu saya merekomendasikan chitika sebagai salah satu situs PPC terbaik alternatif adsense.

Umumnya apabila sebuah blog mempunyai traffic yang tinggi maka penghasilan dari iklan PPC juga tinggi, hal itu tidak berlaku di chitika,

Karena produktif tidaknya sebuah iklan bukan hanya tergantung pada traffic semata akan tetapi tergantung juga pada penyedia iklan tersebut, bagaimana anda menempatkan iklan tersebut secara strategis sehingga potensi untuk pengunjung mengklik iklan tersebut sangatlah besar, apalagi apabila penyedia iklan mampu memberikan iklan yang relevan dengan blog anda, dan itulah yang di sediakan oleh chitika.


Baca : cara memasang iklan adsense


MENGAPA MENGGUNAKAN CHITIKA?

Alasan utama adalah karena blog anda belum di terima google adsense, itu sudah pasti terjadi pada blog dengan traffic yang masih rendah.

Karena google adsense mengharuskan sebuah blog dengan traffic yang tinggi di terima di program mereka. Apabila blog anda mempunyai traffic yang bisa saya katakan lumayan lebih baik untuk sementara anda menggunakan chitika dulu karena komisi dari chitika bukan hanya tergantung pada jumlah klik saja. Apalagi jika pengunjung anda dari US, UK dan Canada maka komisi yang akan di berikan kepada anda adalah $0.10 perklik nya.

BAGAIMANA CARA MENDAPATKAN UANG DARI CHITIKA?


1. Mulai membuat blog

Tentu saja hal pertama dan yang pasti adalah anda sudah mempunyai sebuah blog, karena penempatan iklan chitika adalah di dalam sebuah blog.


Jika anda belum mempunyai blog segeralah membuat blog, karena membuat blog itu gratis dan minim biaya.


buatlah sebuah blog dari bidang yang anda sukai, karena dari bidang yang anda sukai maka akan banyak bermunculan konten-konten yang secara kontinue akan anda postingkan dan secara otomatis akan makin banyak pengunjung yang berujung pada penghasilan anda yang semakin besar.

2. Membuat akun Chitika

Membuat akun chitika sangatlah mudah, hanya butuh waktu beberapa menit saja untuk membuatnya.


yang di perlukan hanya mengisi rincian dasar anda seperti Nama, Alamat, Email dan URL blog anda , membuat usernam dan password anda.

Silahkan kunjungi Situsnya Chitika.com

Setelah anda membuka website chitika kemudian masukkan alamat email anda

daftar dan pasang Iklan Chitika Di Blog


Kemudian masuk ke email anda dan klik Complete My Application
daftar dan pasang Iklan Chitika Di Blog

Setelah itu isikan rincian dasar seperti gambar di bawah ini lalu klik Submit

daftar dan pasang Iklan Chitika Di Blog


3. Menempatkan kode iklan Chitika

Setelah anda mendapatkan persetujuan dari chitika sebagai publisher langkah selanjutnya adalah menempatkan kode iklan tersebut ke blog anda.

Berikut caranya ;

Langkah pertama tentu saja login ke akun chitika anda kemudian klik pada menu Ads, Lihat gambar di bawah ini ;


Seperti gambar di atas yang saya kotakin adalah model tampilan iklan chitika, kemudian anda pilih Customizeuntuk merubah warna button dan text link pada iklan tersebut.

Setelah anda copy kode scriptnya silahkan kode script iklan tersebut pastekan ke blog anda, lihat panduan dari gambar-gambar di bawah ini ;
Login ke blogspot anda klik Tata Letak >> Tambahkan Gadget >> HTML / Javascript


Pilih HTML/JavaScript


Pastekan kode script iklan chitika di bawah ini

daftar dan memasang iklan chitika di blog


setelah anda save lihat hasilnya.


Semoga artikel saya kali ini tentang Cara mendaftar dan memasang kode iklan Chitika di blogspot bermanfaat buat anda dan bisa anda terapkan pada blog anda. Semoga bermanfaat and salam hormat untuk anda untuk semua negara. Reedmore : 11-situs penyedia layanan iklan

Saturday, April 28, 2018

Cara Daftar Buysellads

How to Register Buysellads (BSA) Alternative AdSense


artikel blog injap333jp ~  Buysellads is an advertising services company where publishers can register their web or Blog. Buysellads can be made as an alternative to AdSense, AdSense is layana ad number 1 in the interest of publisher (publisher). But lately it is very difficult to register AdSense, web or blog must benar2 meet ADSENSE keriteria.


Baca : alternatif google adsense terbaik


But if you already have AdSense ads, can be combined with Buysellads loch pal because it can be synchronized between BSA and AdSense. BSA is among the largest advertising companies, in BSA's observations differing 2 ranks below AdSense ranked 3rd in the World.

Unfortunately, for the time being BSA does not allow the Site to contain non-English content. But that provision does not apply to sites that already have visitors (traffic) high. Here are some sites / websites that may join or join the BSA:
BSA Sign Up Basic Requirements:

1. Minimum traffic less 500,000 (five hundred thousand) per month.
2. Site does not contain pornographic, violent and illegal content.
3. Site or net web from other non-targeted ads.
4. Language introductory sites include English, German, Italian, French, Dutch, Japanese, Korean, Chinese, Romanian, Spanish, Portuguese.

Above is the basic requirement if you want to join BSA, now how to join it. Here's the guide:
How to Apply Buysellads (BSA)
1. Peratama visit buysellads.com/users/register
2. Then you are asked to fill out the registration form, fill in correct yes buddy. Here's an example of the form:


Baca : cara menyadap whatsapp


How to Charge:


Baca : cara membuat akun google and gmail

Email Address: Enter your email address.
First Name: (First Name) Last Name: (Last name)
Password: create your password
Confirm password: Re-type password
Company Name: Company name, fill in the name of your site (Example: AakShare)
Terms of Service: Check the I Agree to the Terms
Click the Create An Account button (Remove My Account)

If you have successfully registered, it is time to register your Site or web. If you have successfully registered, it is time to register your Site or web.

1. Please Log-in to buysellads.com/publishers
2. Then click the getstarted button located at the top right of the screen


3. Then you will be taken to the registration page to add a new site, fill in the registration form correctly. Here's an example of charging:


First Name: (First Name) Last Name: (Last name)
Email: (Enter your e-mail address)
Website URL: (your Web / Blog URL address)
Average Monthly Pageviews: (Fill how many average visits per month of your site, there are choices of less than 500 rbu, etc).
Are you currently using any of the following to serve ads? : (Please Choose one of the ad methods below, if you are using one):
DoubleClick for Publishers (DFP)
- Adzerk
- OpenX
- Other
Anything else you would like us to know: (Write down with anything, what to say)
Click the Submit button 4. Then the thank you note will appear.


It shows that your site or website is in a riview period. Wait until 3-4 days, Buysellads party will provide info via email whether your website or web in agree or in decline.


Baca : cara menggunakan secreto site

How to install Buysellads Ads (BSA)
If your site is approved (Full Approve) by the BSA, the next step is advertising by taking the ad code on the BSA and then attached to your site. Here's the guide:


First log-in to buysellads.com using the username and password you registered yesterday.
Next visit http://buysellads.com/sell => Then you will be redirected to Ad Zone
Then on Inventory => click Add Inventory button
Next you Fill out the form to determine the price, ad size, payment method (per month or per-1000 impressions (CPM), and others.
Then click Next and Save Zone button


Baca : inilah penyedia iklan bayaran tinggi


Buysellads if compared with AdSense is still far away because the reach of AdSense is very far away, so many publiher interested to be Publiher AdSense and Blogs that do not have traffic that is not too high can also be registered AdSense.


So, I convey How to Register Buysellads (BSA), thank you for visiting and good luck. Greetings Success for all of us and all greetings


Reedmore: 11-situs penyedia layanan iklan

Friday, April 27, 2018

Cara Memasang/Mendaftar Iklan ADPIXO

Highest paying Adpixo popunder ads | the most complete tutorial

memasang iklan adnow ~Adpixo is one of the advertisers advertisers who pay dearly to publishernya. The system is paid per impression with the popunder model, popunder is an alternative to content blogs that do not use GA (google adsense) with the ad model will open automatically on menubar.

Adpixo is a stinky advertising service from 2016 -2017 that will be in demand as it is transparent to the daily statistics >> the number of immpresion to the value of pay per impression.

Adpixo will pay its publisher with a minimum minimum $ 10 minimum cashout so it is very good if used on blogs from low traffic to high traffic. And it is suitable to be installed on blog or viral site daftar disini Situs Website

How to list and advertise

First you open Adpixo page

Next I explain with picture:

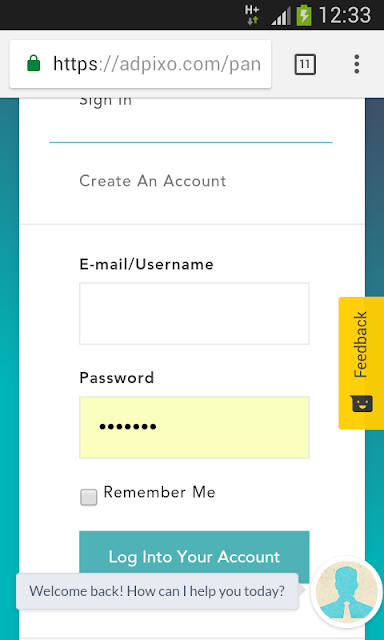
1. first, you register to finish and login  


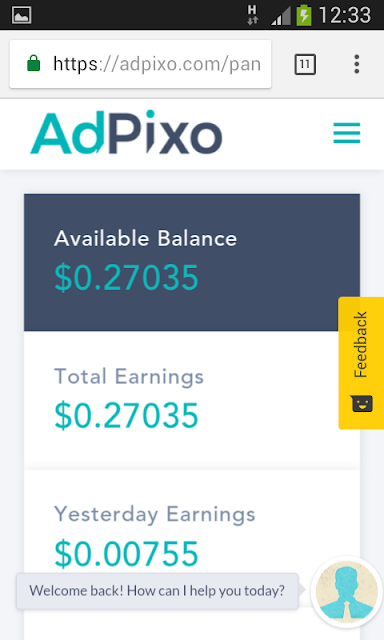
2. The first view is like this form of income data information. This income data on blogs with visitors 10 -50 per day.  If you are just starting then the aa revenue data is $ 0


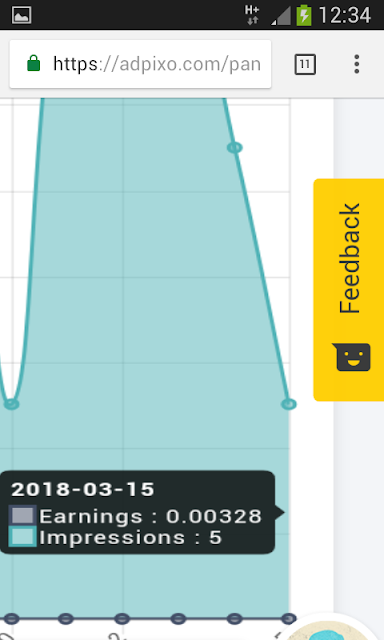
3. Statistics You can see the value and number of impression perday and how much it paid. Look at the info data that appears if we gesar at the point of daily statistics, written on 15 -3 - 2018 there are only 5 immpression and paid $ 000328. If you just register the statistical data tetsebut will be empty


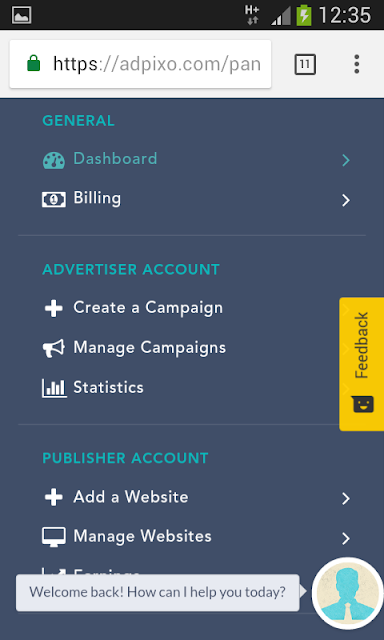
 4. Well for those of you who are new list secrol bais riga in the top corner.  Then you will see the display on the picture below in the form of advertisers page if you want to be advertisers and publishers if you want to get earnings from blog.  Because you want to be a publisher then your page publisher section, press >> add website


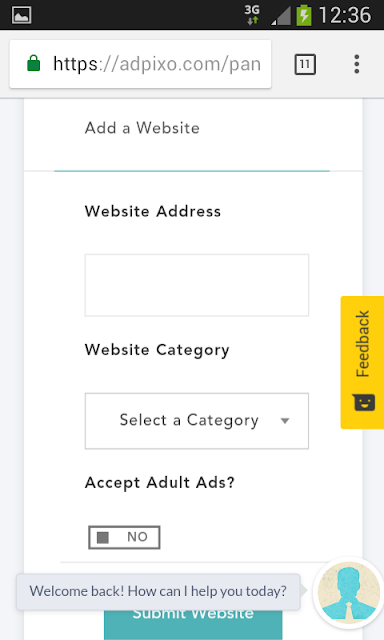
 5. A column will appear to include your website >> categorry >> submite website 


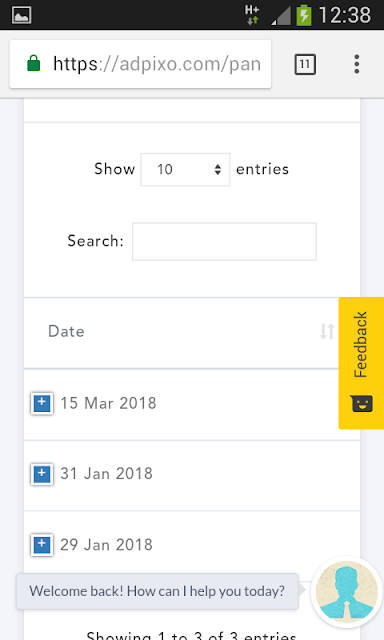
6. There will be reports that you successfully submite. Next go back to step 4. In the publisher secroll >> Manage the website it will appear a list of websites that you submite marked with submite date.  Secrool >> plus sign


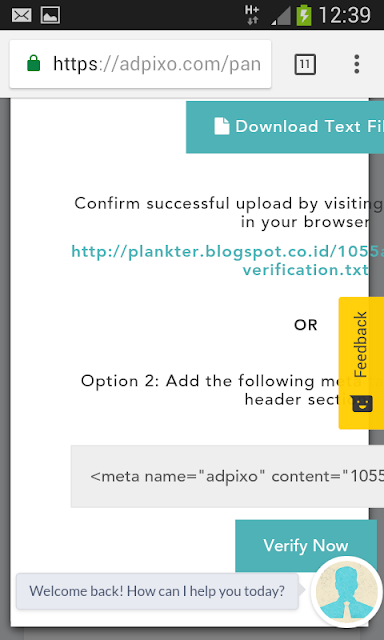
 7. After secrol >> plus sign then you will be brought here, that is verification page to connect between website owner with adpixo.  Secroll or press >> word verify Now


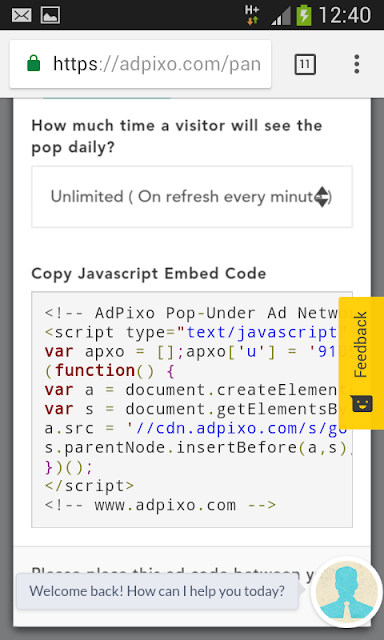
 8. After press >> ferivy Now will appear the data as below.  To more easily select option 2 that is grab html tag, copy meta tags >> go to blooger >> theme >> edit html >> fast code just below the code <head> before code <\ head> or in between.  The steps are exactly the same as you put google webmaster verification.  After selesei you save your html or tamplet.  Go back to adpixo then press >> verify Now.  If you have had time to remove the page, re-open the website >> plus your website >> verify now >> and directly colleagues verify Now.  Karen before you have put the verification code.


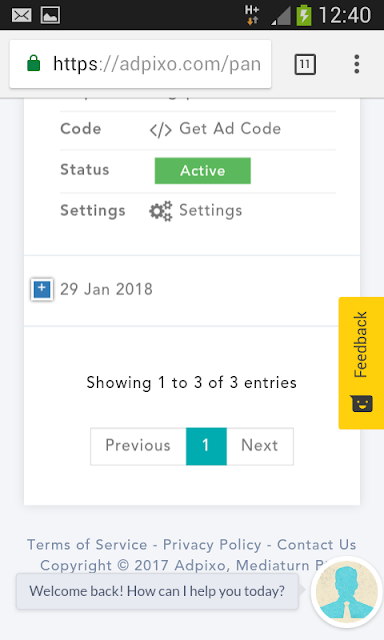
9. Go back to menu >> manage website >> sign plus your wevsite >> will not active active status green color. Then press >> get ad code, that is your ad cod


 e  10. A new page will come up with a code copy of all the code, then place it just below the code <head> or before the code <head> or between the two.  Suggestion, place the code right under the previous verification code so that you can easily find it if you occasionally want to remove the ad.


 A few tutorials adpixo for  injap333jp Hopefully  useful and best regards to you all and for all countries

Menikah Dengan Orang Jepang

Menikah Dengan Orang Jepang

Assalamualaikum.wr.wb Salam hormat selalu untuk semua negara dimanapun berada. Saya akan memberikan informasi pada para siapapun yang mel...